Component setup
To set up the Komodo Insights Component in your Salesforce environment after the initial installation, please complete the following steps.
Note
The steps below assume that the Komodo Insights Component has already been installed in your Salesforce environment and that you have a Consumer Key and Consumer Secret. If you have yet to install the component or receive your customer credentials, please reference Installation and reach out to your Komodo Health Customer Success Manager (CSM).
Create an Auth. Provider
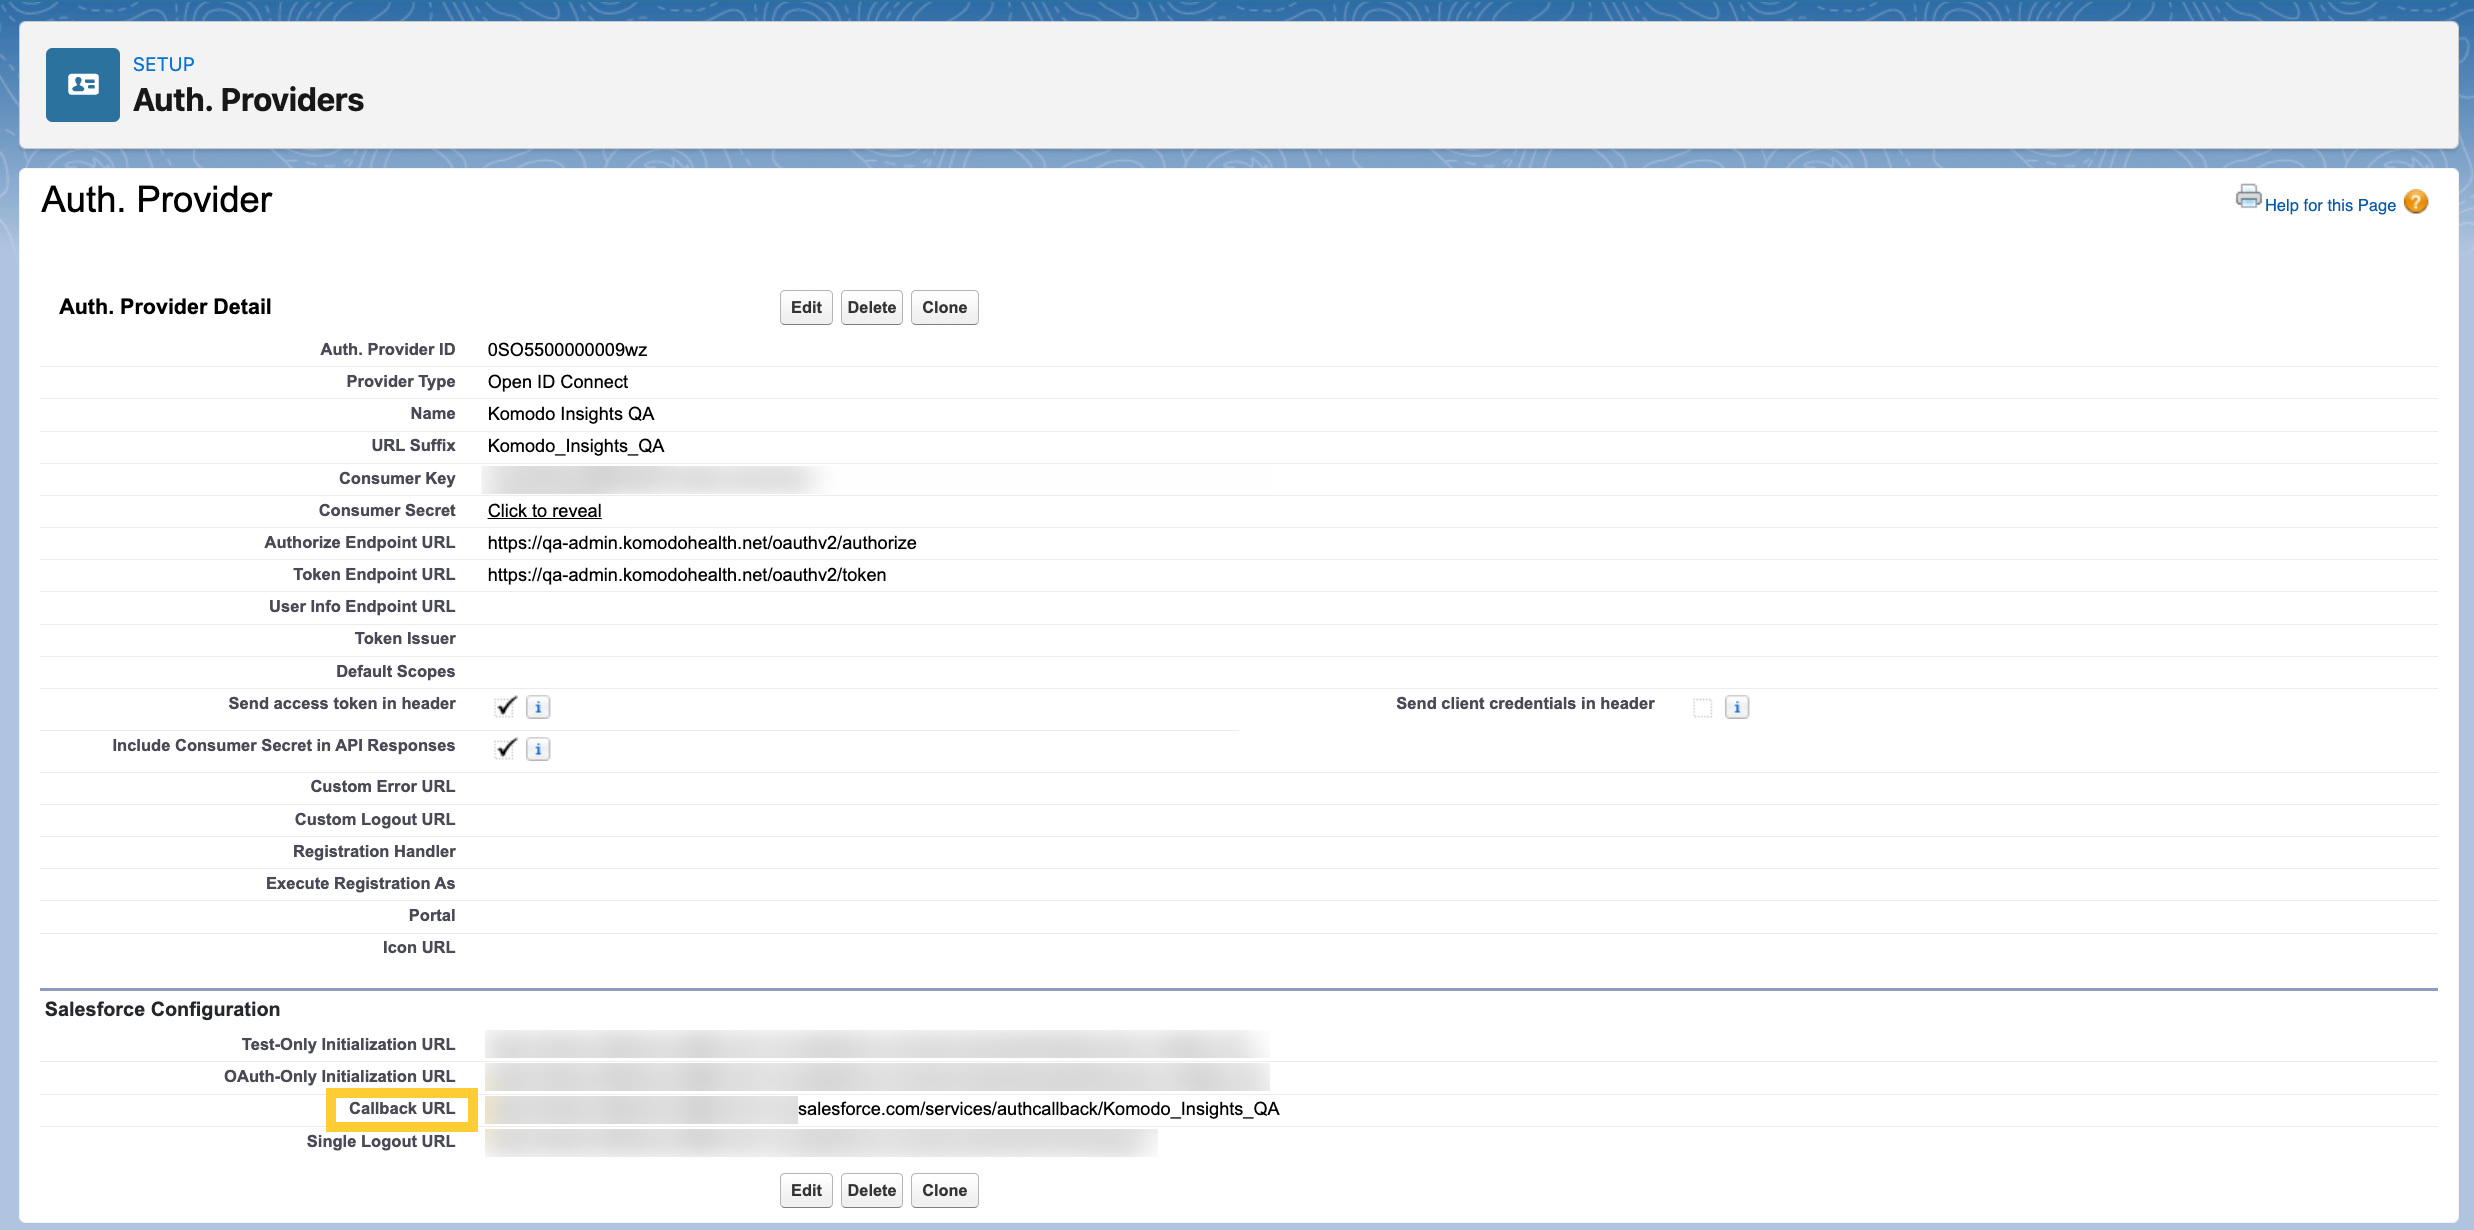
To allow your users to log into the custom Komodo Insights Component with their Salesforce credentials, you need to create a Salesforce authentication provider.
In the Quick Find box in Setup, search for and select Auth. Providers.
Click New.
Set the Provider Type Name to
Open ID Connect. Additional fields will appear.Enter a Name for the provider. The URL Suffix will populate automatically.
Enter the Consumer Key and Consumer Secret you received from Komodo Health CSM.
Set the Authorize Endpoint URL to
https://aperture-admin.komodohealth.net/oauthv2/authorize.Set the Token Endpoint URL to
https://aperture-admin.komodohealth.net/oauthv2/token.Keep all other fields as they are, and click Save.
Provide the Callback URL under the Salesforce Configuration section to Komodo Health CSM. This will allow Komodo Health to catalog your URL as a trusted endpoint for added security.

Create a new Named Credential
The Komodo Insights Component Named Credential from the initial installation needs to be updated to include the newly created authentication provider.
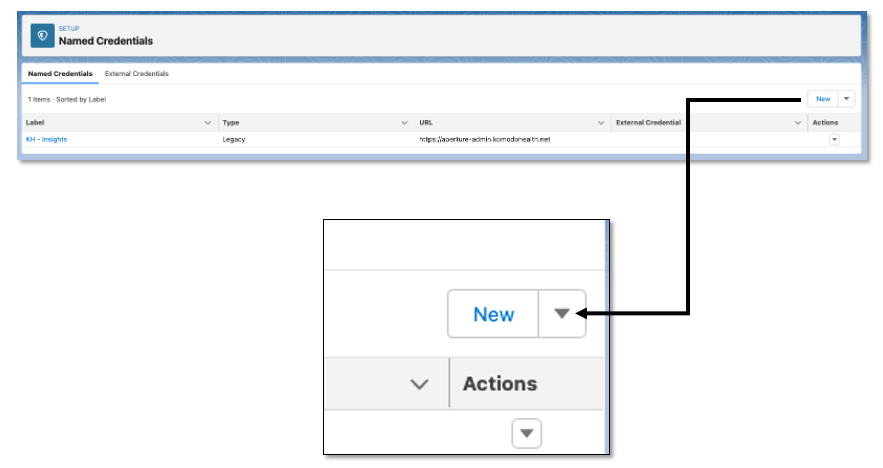
In the Quick Find box in Setup, search for and select Named Credentials.
Click the dropdown arrow next to New and select New Legacy.

Complete the following fields:
Label: Example, KH Insights
Name: Auto-populated
URL: https://aperture-admin.komodohealth.net/
Certificate: Leave
nullIdentity Type: Per user
Authentication Protocol: OAuth 2.0
Authentication Provider: Select Auth. Provider created in step 1
Scope: aperture-iris:tag:read openid offline_access
Start Authentication Flow on Save: Check this to initiate authentication
Generate Authorization Header: Checked
Allow Merge Fields in HTTP Header: Unchecked
Allow Merge Fields in HTTP Body: Unchecked
Click Save.
Note
This step can only be completed once the Callback URL is provided to your Komodo Health representative and has been added to our list of allowed Callback URLs. If you continue to see the "Callback URL mismatch" error, please reach out to your Komodo Health representative for assistance.
Update custom metadata
You will need to update the Komodo Health Insights Settings (mvn__KHBI_Komodo_Insights_Settings__mdt) custom metadata type and the Named Credential you just created.
To do so:
In the Quick Find box in Setup, search for and select Custom Metadata Types.
Click Manage Records next to the Komodo Health Insights Settings custom metadata type.
Click Edit next the the Default record.
Add the Named Credential you created into the Named Credential field.
Click Save.
Configure a permission set
Komodo Health recommends using a permission set to manage access to the Komodo Insights Component.
In the Quick Find box in Setup, search for and select Permission Sets.
Create a new permission set or select an existing one.
In the permission set, click Apex Class Access.
Click Edit.
Add mvn.KHBI_KomodoComponentCtrl to the Enabled Apex Classes list.
Click Save.
Click Permission Set Overview to return to the permission set.
In the permission set, click Named Credential Access.
Click Edit.
Add the Named Credential created above to the Enabled Named Credentials list.
Click Save.
Assign the permission set to the users who should have access to the Komodo Insights Component.
Note
Optionally, you can also create and add a custom permission to the permission set so that the component is only visible to users assigned with the permission set. Visit Salesforce's documentation on how to Create Custom Permissions and Enable Custom Permissions in Permission Sets.
Add to page(s)
The Komodo Insights Component needs to be added to one or more pages for your users to use the component.
Open the desired page(s) in the Lightning App Builder.
Drag and drop the KH - Komodo Health Insights custom component into the desired location on the page.
Set the Record NPI Field to the API name of the field on the record that contains the desired National Provider Identifier (NPI) value. For example, if you are adding the component to the Account record page and have a field on the Account object with the API name of
NPI__c, enterNPI__c.Click Save.
Note
If you created and added a custom permission to the permission set for the component, you can add a filter on the component in the page layout so that the component will only display for users assigned with the permission set. Visit Salesforce's documentation on Dynamic Lightning Pages.