In-house snapshot generation
Snapshots are PDFs that format information from designated records into tabular layouts. Snapshots can be generated either with our Nintex integration or our in-house solution.
Nintex integration | In-house solution |
|---|---|
Available for Interaction and Request records. | Available for Interaction, Request, Adverse Event, and Product Quality Complaint records. |
Can only generate and export 1 snapshot at a time. | Can generate and export an unlimited number of snapshots at a time. |
The process only runs via manual user action. | The process can run automatically in the background via triggers or batch jobs. Reference Generate snapshots with Apex method. |
Can merge additional files into the snapshot. | Cannot merge additional files into the snapshot. |
Has greater configurability overall. | Has greater performance and speed overall. |
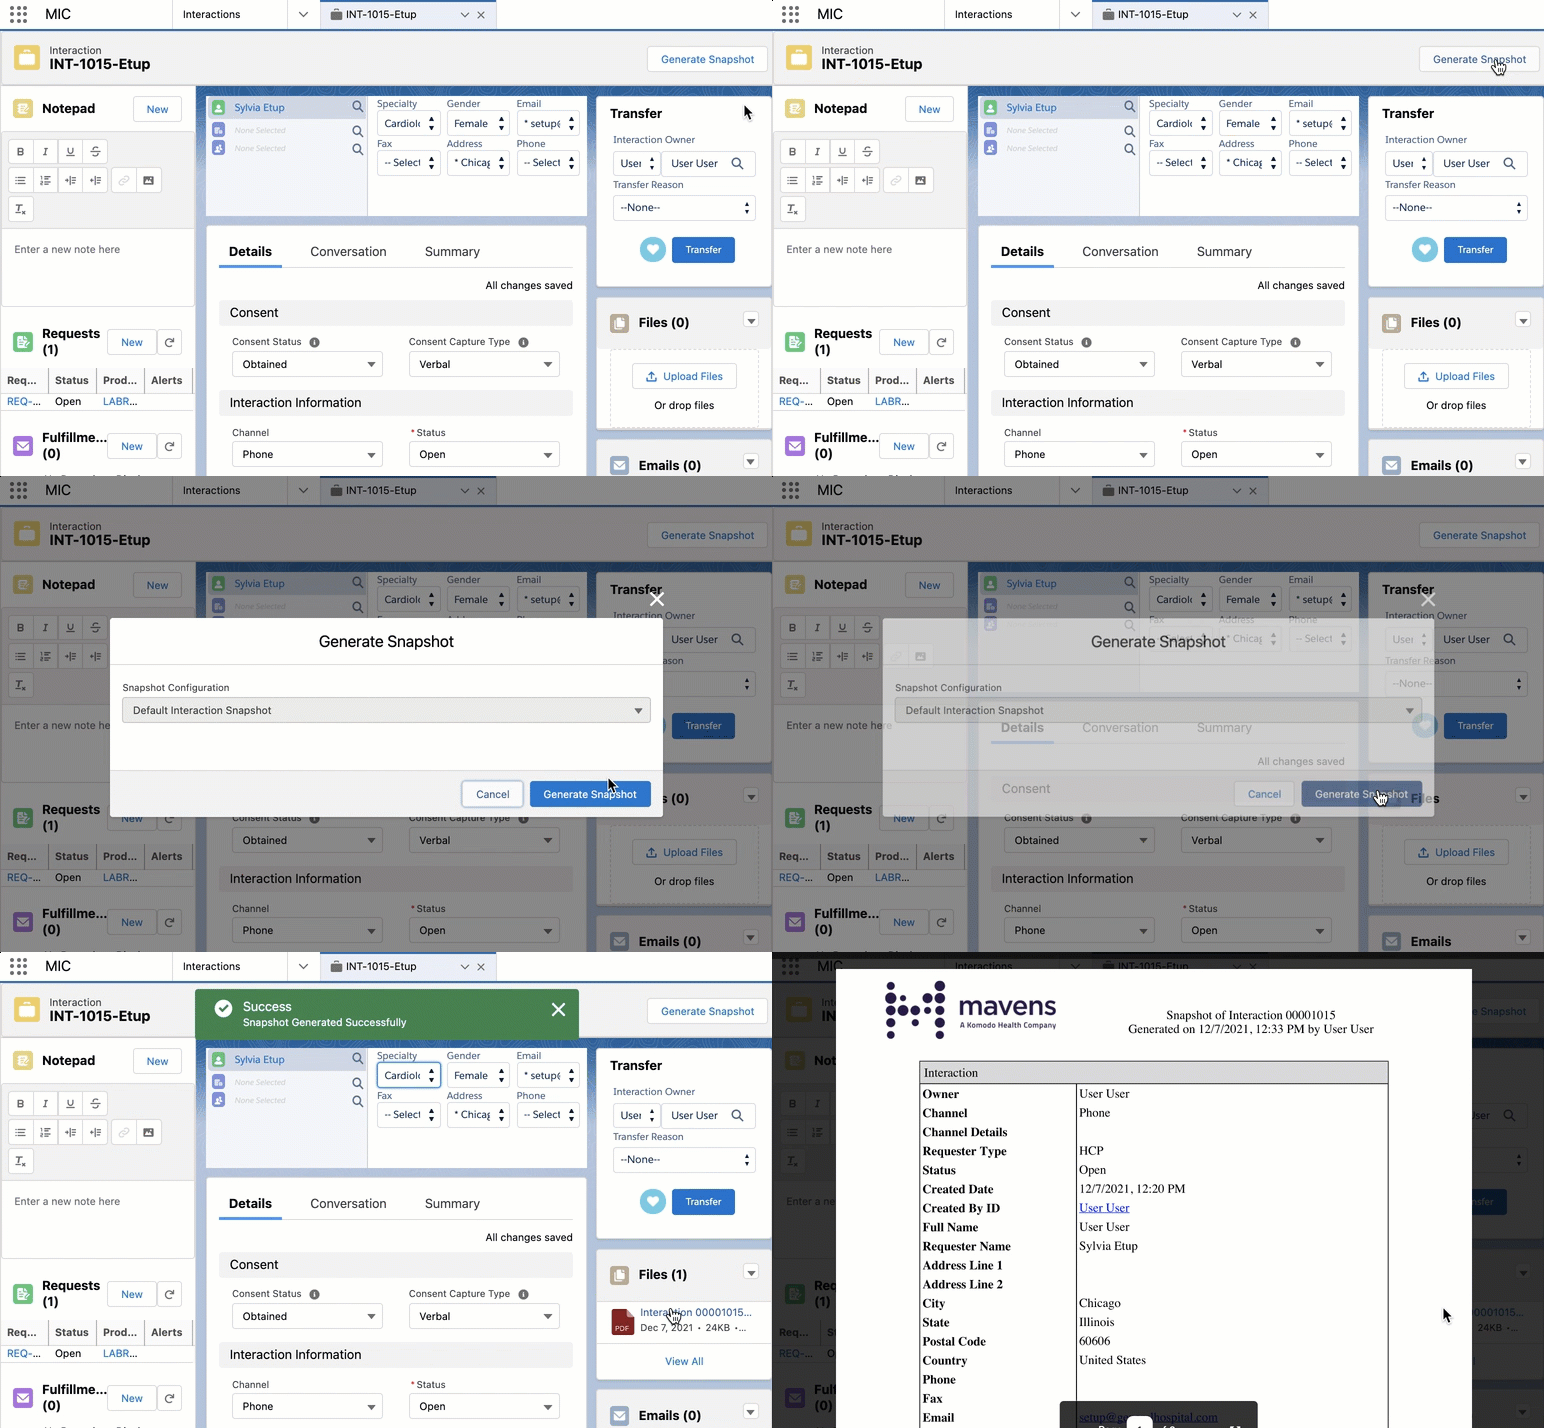
With the in-house solution, users can create snapshots via quick actions. When users click Generate Snapshot for a given record, a modal will open to confirm the Snapshot Configuration Name of the parent snapshot object to be generated.

For Adverse Event records, sending an email to Safety automatically generates a new snapshot and merges it into the email attachment. Likewise, for Product Quality Complaint records, sending an email to QC automatically generates and merges a new snapshot into the email attachment as well.
Configure page layouts
To enable the in-house generation of snapshots for an Interaction, Request, Adverse Event, or Product Quality Complaint record:
Open the associated Page Layout Editor for the designated object. For more information about Page Layouts, visit Page Layouts in Salesforce Help.
Drag and drop the Generate Snapshot (
MED_MIC_Snapshot) Mobile & Lightning Action into the page layout.Note
The Name of the in-house Generate Snapshot action is
MED_MIC_Snapshotwhile the Name of the Nintex Generate Snapshot action isMED_Snapshot.Drag and drop the Files Related List into the page layout.
Click Save.
Open a page of the page layout in the Lightning App builder.
Add a Related List - Single component to the page. The Parent Record should be the current record while the Related List should be Files. This is where the generated snapshot files will be located.
Click Save.
Configure snapshot layout
You can configure which parent, child, and grandchild objects as well as which fields of these objects are to be included in the generated snapshots. Visit Objects.
Create and modify snapshot objects
To create a new or modify an existing snapshot object that can be generated:
Open the Snapshot Configuration custom metadata type settings in Setup.
Click Manage Snapshot Configurations.
Click New to create a new snapshot object or select a label and then Edit to modify an existing snapshot object.
Enter a Label to represent the snapshot object. Komodo Health recommends formatting the label so that it includes the parent object, if applicable, followed by a colon and the current object.
Enter the Snapshot Configuration Name used by the generate Snapshot Apex method and managed packages to identify the snapshot object.
Select the designated Snapshot Object.
Enter the desired Field Set Name.
If the snapshot object is a child or grandchild object to be included in a parent object's snapshot, enter the Parent Snapshot and select the Relationship Field.
Note
Supported parent objects include:
Interaction
Request
Adverse Event
Product Quality Complaint
Click Save.
Reference the Snapshot Configuration custom metadata.
Create and modify snapshot fields
For each parent, child, or grandchild object, to create a new or modify an existing field set used in a snapshot:
Open the object in Object Manager.
Click Field Sets.
Click New to create a new field set or select a field label to modify an existing field set.
Drag and drop the desired fields accordingly. For more information about Field Sets, visit Field Sets in Salesforce Help.
Click Save.
Configure snapshot branding
You can customize the design of the generated snapshots to fit your branding needs with the following Static Resources:
Static resource | MIME type | Description |
|---|---|---|
MED_Snapshot_Logo | image/png | The organization's logo that is displayed in the generated snapshots. |
MED_Snapshot_Style | text/css | The Master style sheet to design the generated snapshots. |
Generate snapshots with Apex method
In-house snapshots can also be generated by calling the globally exposed MED_SnapshotService.generateSnapshots Apex method. Each snapshot object listed will have its own snapshot file generated. We recommend calling this method in a batch job when multiple snapshot files are to be generated at once.
Parameter | Type | Required? | Description |
|---|---|---|---|
sObject | List of objects | Yes | The list of snapshot objects that are to be generated. The ID and Name fields for each sObject are required. |
snapshotConfigName | String | Yes | The Snapshot Configuration Name of the top-level snapshot record will identify and include the linked child records in the snapshots accordingly. |
Metadata
The custom metadata object listed below helps define and configure the in-house snapshot generation functionality.
Snapshot Configuration (in-house) (
MED_Snapshot_Config__mdt) - settings related to the in-house snapshot generation functionality. With this metadata, you can configure the objects, fields, and layout of the generated snapshots for the designated records.