Security and Auditing
For more information on Security and Auditing in the Inquiry Management product, visit the topics below.
Anonymization
Medical Information Cloud allows you to anonymize certain account information as long as there is no legal hold on any associated Accounts. Medical Information Cloud accommodates this via configurable custom metadata types, flows, and scheduled jobs.
Account anonymization configuration
You can configure which Accounts can be deleted during the anonymization
process by editing the Anonymization Deletable Account Source
(MED_AnonymizationDeletableAccountSources__c) custom field in the
Local Setting (MED_Local_Setting__mdt) custom metadata type.
To configure:
-
In Setup, search for Custom Metadata Types in the Quick Find box.
-
Click on the Local Setting (
MED_Local_Setting__mdt) custom metadata type. -
Under the Custom Fields section, click Edit next to Anonymization Deletable Account Sources.
-
Add or edit the Default Value under the General Options section.
warningThe Default Value is 'Medical Information Cloud'.
::::
You can also include your custom objects in the anonymization process,
using the Anonymizable Object Settings
(MED_Anonymizable_Object_Settings) custom metadata type.
Anonymization flows
The Request, Fulfillment, Adverse Event, Interaction, and Product Quality Complaint objects anonymization of record fields are handled by flows, each of which is associated with an object.
Anonymization flows
| Flow label | API name | Object |
|---|---|---|
| AE Primary Source: Anonymize | MED_AE_Primary_Source_Anonymize | AE Primary Source |
| Fulfillment: Anonymize | MED_Fulfillment_Anonymize | Fulfillment |
| Inbound Form: Anonymize | MED_Inbound_Form_Anonymize | Inbound Form |
| PQC: Anonymize | MED_PQC_Anonymize | Product Quality Complaint |
| Interaction: Anonymize | MED_Case_Anonymize | Interaction |
To add or remove fields to be anonymized, edit the appropriate flow fields.
Prior to v12, this anonymization was handled by workflows. Upgraded Inquiry Management instances need to deactivate the old workflows and activate the new Flows.
Permissions
The Anonymize Account permission set allows users to flag an Account for anonymization within 24 hours. Users who do not have the "Anonymize Account" permission set can select this box, which enables those who do have the "Anonymize Account" permission set to initiate the anonymization process.
Batch jobs
The anonymization batch job is used to clear out data that should not be stored in the system beyond the time period for which it is needed. Once an Interaction is closed the data can be removed from the system. This This allows the system to comply with local country laws.
When activated, the job runs hourly and reads from the Anonymization
Setting records to determine the set of Interactions that should be
anonymized. The job finds any records that are in the configured
countries or accounts that have been explicitly marked for anonymization
(MED_Anonymize__c=true) and do not have a legal hold
(MED_Legal_Hold__c=true).
For each account, the job checks if all cases are closed and fall
outside the hold period (close date + hold days). If all cases are
closed, then the job marks MED_Anonymize__c as true on the
Interaction and all associated Requests, Fulfillments, Adverse Events
(including children), and Product Quality Complaints. It then
selectively deletes related files/emails/notes according to the
Anonymizable Object Settings and flows anonymize the fields on these
objects. Finally, the Account is deleted.
Before running or scheduling the anonymization service, check the
Anonymization Settings very carefully. Any accounts that meet the
criteria there (regardless of the MED_Anonymize__c checkbox) will be
immediately anonymized which can cause irrevocable data loss.
Scheduling the batch job
By default, the batch job is not turned on. It can be turned on by executing a command in the developer console's Execute Anonymous window. Follow these steps to enable the batch job to run every hour:
Ensure the user that is executing these steps has the Bypass Validation permission set; otherwise, the job will fail when it runs.
-
Open an Execute Anonymous Window. See Salesforce's documentation.
-
In the Execute Anonymous Window, enter
MED_AnonymizerBatch.scheduleHourlyJob();and then click Execute.:::
 :::
:::
In the Logs tab at the bottom of the developer console, you should see a log with the status Success.
You should also see the Anonymizer job listed under Setup > Jobs> Scheduled Jobs. You can delete the job there if it is no longer required.
Data Audit Trail
Inquiry Management offers several features around tracking changes to data within your instance over time. These features cover changes at the record-level in addition to field-level changes. These features are not meant as a replacement for native functionalities available on the Salesforce platform, such as Shield; rather, they are intended to supplement and enhance those capabilities.
When implementing features and configuring to meet requirements around tracking data changes over time, it is important to consider all available features (Salesforce and Inquiry Management) and determine the right mix to solve your requirements holistically.
Record-level event audit
Record-level events are those events that pertain to an entire record. Example events include delete, update, and insert. These events apply to an entire record and are not specific to a single field.
Delete tracking
Inquiry Management offers an audit trail of records that have been deleted within the system. This feature is auto-enabled for Inquiry Management objects and does not require additional configuration to enable.
Supported objects
Tracking is available on the following core Inquiry Management objects:
-
Account
-
Adverse Event
-
AE Drug History
-
AE Drug Information
-
AE Medical History
-
AE Primary Source
-
AE Reaction
-
AE Result
-
Affiliation
-
Case (Interaction)
-
Contact Information
-
Content Document**
-
Content Document Link**
-
Data Change Request
-
Data Change Request Line
-
Email Message**
-
Fulfillment
-
Inbound Form
-
Product
-
Product Quality Complaint
-
Request
-
Request Document
-
Request Fulfillment
** Only tracked if related to one of the following Inquiry Management objects
Audit trail details
Each time a record of one of the above object types is deleted from the
system, the following information is captured on the
Deleted Record Audit Log
(mvn__Deleted_Record_Audit_Log__b) big object within Inquiry Management.
mvn__Deleted_Record_Audit_Log__b schema
| Field label | API name | Data type | Description |
|---|---|---|---|
| Event Details | mvn__Event_Details__c | Long Text Area(131072) | Any additional information that was provided regarding the deletion event or transaction. |
| Object Type | mvn__Object_Type__c | Text(62) | The API name of the object of the record that was deleted. |
| Occurred At | mvn__Occurred_At__c | Date/Time | The date and time that the record was deleted. This is in GMT. |
| Occurred On | mvn__Occurred_On__c | Text(10) | The date and time that the record was deleted. This is in GMT and formatted as YYYY-MM-DD. |
| Origin | mvn__Origin__c | Text(255) | The cause or source of the record deletion. For example, if the record deletion was manually initiated by a user or completed by some automation (e.g., Anonymization Service). |
| Parent Id | mvn__Parent_Id__c | Text(18) | The ID of the parent record whose deletion caused the child record to be subsequently deleted as well (i.e., via cascade delete). |
| Performed By | mvn__Performed_By__c | Lookup(User) | The user who initiated the record deletion. Note: In rare cases, a record deletion may be the result of a process that runs under an "Automated Process User" that does not have a corresponding User record. In such scenarios, the name of the user will be specified in the Performed By Id field. |
| Performed By Id | mvn__Performed_By_Id__c | Text(18) | The ID of the user or the name of the system user that initiated the record deletion. |
| Record Id | mvn__Record_Id__c | Text(18) | The ID of the record that was deleted. |
| Transaction Id | mvn__Transaction_Id__c | Text(36) | The UUID v4 ID for the event or transaction in which the record deletion occurred. All records deleted within a given context will share the same transaction ID. |
| Type | mvn__Type__c | Text(25) | The type of event or transaction that occurred (e.g., Delete). |
Extending Record Audit Trail
Inquiry Management offers two ways in which the Record Audit Trail functionality may be extended:
-
Including change events from custom objects
-
Subscribe to change events published for native Inquiry Management objects to apply custom treatments of record change events
Tracking record events on custom objects
Out of the box, this system is pre-configured for the majority of objects relevant to Inquiry Management. For customers who have created custom objects within their Inquiry Management instance, this feature can be extended to support those objects.
To extend delete tracking to a custom object, customers simply need to
fire instances of the Change Event custom platform event
(mvn__Change_Event__e). Platform events can be fired within Apex
classes and triggers in a variety of scenarios. For additional
information on platform events, visit Salesforce's
documentation.
Change Event platform event
The following table contains the fields present within the Change Event
platform event (mvn__Change_Event__e).
| Field API Name | Required | Description |
|---|---|---|
| mvn__Error_Handler_Class__c | No | An optional apex class API name to override how errors are to be handled. Reference the custom error handling section below for additional details. |
| mvn__Event_Details__c | No | Any additional details surrounding the event that need to be captured that do not fit into a discrete field. |
| mvn__Occurred_At__c | Yes | The date and time the record event occurred. |
| mvn__Origin__c | No | The source or origin of the event such as an integration or automated process. |
| mvn__Parent_Id__c | No | In the event a given event is the result of a cascading operation the Parent ID is meant to capture the ID of the record that triggered a given event. |
| mvn__Performed_By_Id__c | Yes | The ID of the User that performed the record event. |
| mvn__Record_Id__c | Yes | The ID of the record against which the event occurred. |
| mvn__Object_Type__c | Yes | The type of the object against which the event occurred. |
| mvn__Transaction_Id__c | Yes | The ID of a transaction that a given event occurred within. Events that occur in the same context should share a common transaction ID. When publishing events a constants class has been provided with a generated UUID v4 that may be used as a transaction ID (see mvn__AuditTrailConstants.transactionGUID). |
| mvn__Type__c | Yes | The type of event that has occurred. The allowed values for this field are as follows: Delete, Create, Update, Undelete, Viewed, Downloaded. When publishing events a constants class has been provided with an ENUM to guide customers in the selection of the appropriate value (see mvn__AuditTrailConstants.EventType). |
Field-level event audit
Field-level events are changes made to a specific field or attribute on a given record (e.g., First Name vs. Account).
Change tracking
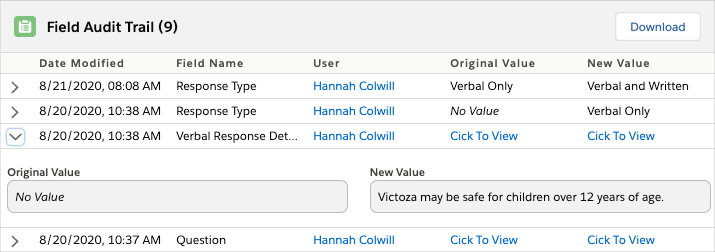
Inquiry Management now offers an audit trail of fields that have had a change in value as a result of an insert or update. This feature is not enabled by default for Inquiry Management objects and does require additional configuration to enable. Value changes made to tracked fields will be logged to Field_Update_Audit_Log__b Big Object within Inquiry Management.
This feature is intended to supplement the native Salesforce change tracking functionalities made available on the Salesforce platform. This is, in part, to ensure available data storage capacity is consumed judiciously as this feature has the potential to generate high data volumes in scenarios where fields that are subjected to high entropy are tracked. Customers should consider data storage consumption when determining their holistic implementation of field change tracking.
Supported objects
As stated above, no fields are enabled for change tracking out of the box. That said, the necessary traps (Apex triggers) are in place for most core Inquiry Management objects such that once fields are enabled for change tracking the system will behave as expected. For information on how to extend this functionality beyond the core Inquiry Management objects, visit Extending Field Audit Trail.
Field tracking is available on the following core Inquiry Management objects:
-
Account
-
Adverse Event
-
AE Drug History
-
AE Drug Information
-
AE Medical History
-
AE Primary Source
-
AE Reaction
-
AE Result
-
Affiliation
-
Case (Interaction)
-
Contact Information
-
Fulfillment
-
Inbound Form
-
Product
-
Product Quality Complaint
-
Request
Supported field types
The following types of fields are supported within the field change tracking:
-
Currency
-
Date
-
Datetime
-
Multi-select Picklist
-
Percent
-
Text (includes all variants of text area / long text fields)
-
Time
Inquiry Management attempts to convert field types not explicitly listed above by attempting to retrieve a value via String.valueOf(<field in question>).
Audit trail details
Each time a record of one of the above object types has a tracked field that undergoes an update, the following information is captured within the Field_Update_Audit_Log__b Big Object within Inquiry Management.
| Field | Description |
|---|---|
| After Value | The new value of the field (post update). |
| Before Value | The original value of the field (pre-update). |
| Data Sensitivity | A classification of data sensitivity, largely for reporting purposes. Available values are Not Sensitive, PII, and PHI. |
| Event Details | Optional field that contains additional information surrounding the event when supplied. |
| Field Name | The API name of the field that was updated. |
| Object Type | The API name of the object type the update occurred against. |
| Occurred At | The date and time of the update. |
| Origin | The cause or source of the record deletion (if available). For example, Anonymization Service. |
| Performed By | A lookup to the User record that performed the update (if available). |
| Performed By ID | The ID of the User that performed the delete, or the name of the system user that performed the delete. |
| Protected Value | Indicator that dictates whether before and after values are captured. |
| Record ID | The ID of the record that was updated. |
| Transaction ID | A UUID v4 ID for the transaction in which the delete occurred. All records deleted within a given context will share the same Transaction ID. |
Enabling fields for change tracking
All configurations to enable fields for change tracking are made on the Field Audit Settings custom metadata type. To enable a field on a supported object (see list above for supported objects), simply create an entry in the custom metadata type specifying the following:
| Field | Description |
|---|---|
| Capture Values | A boolean to indicate whether before and after values should be captured. |
| Data Sensitivity | A classification to indicate how sensitive a given field is. |
| Field Name | The API name of the field to be tracked. |
| Object Type | The API name of the object on which the field to be tracked resides. |
Extending Field Audit Trail
Inquiry Management offers two ways in which the Field Audit Trail functionality may be extended:
-
Include field change events on objects not supported natively
-
Subscribe to field change events published for native Inquiry Management objects to apply custom treatments of field change events
Tracking field changes on custom objects
Out of the box, this system is pre-configured for the majority of objects relevant to Inquiry Management. For customers that have created custom objects within their Inquiry Management instance, this feature can be extended to support those objects, or standard Salesforce objects that are not supported natively.
To extend field change tracking to an unsupported object, customers
simply need to fire instances of the Field Change Event custom platform
event (mvn__Field_Change_Event__e). Platform events can be fired
within Apex classes and triggers in a variety of scenarios. For
additional information on platform events, please refer to Salesforce
documentation.
Field Change Event platform event
The following table contains the fields present within the Change Event
platform event (mvn__Field_Change_Event__e).
| Field API Name | Required | Description |
|---|---|---|
| mvn__After_Value__c | No | The new value of the field (post-update). |
| mvn__Before_Value__c | No | The original value of the field (pre-update). |
| mvn__Data_Sensitivity__c | No | A sensitivity classification for the field. |
| mvn__Error_Handler_Class__c | No | An optional apex class API name to override how errors are to be handled. Reference the custom error handling section below for additional details. |
| mvn__Event_Details__c | No | Any additional details surrounding the event that need to be captured that do not fit into a discrete field. |
| mvn__Field_Name__c | Yes | The API name of the field that was updated. |
| mvn__Object_Type__c | Yes | The type of the object against which the event occurred. |
| mvn__Occurred_At__c | Yes | The date and time the record event occurred. |
| mvn__Origin__c | No | The source or origin of the event such as an integration or automated process. |
| mvn__Performed_By_Id__c | Yes | The id of the User that performed the record event. |
| mvn__Protected_Value__c | Yes | Indicates whether before and after values should be captured. |
| mvn__Record_Id__c | Yes | The id of the record against which the event occurred. |
| mvn__Transaction_Id__c | Yes | The id of a transaction that a given event occurred within. Events that occur in the same context should share a common transaction id. When publishing events a constants class has been provided with a generated UUID v4 that may be used as a transaction id (see mvn__AuditTrailConstants.transactionGUID). |
Expose field change data in the Lightning user interface
::: Field Audit Trail Related List is a Lightning component that displays field-level change tracking information for a record. The displayed information is an aggregate view of audit trail events from three sources:
-
Salesforce's Shield's Field Audit Trail
-
Salesforce's normal field history tracking
-
Inquiry Management's Field Audit Trail
 :::
:::
For component implementation considerations, visit Field Audit Trail Related List.
Custom error handling
When errors occur in the handling of published Field Change Events, a
default treatment is applied to gracefully handle and log any errors
that may have occurred. By default, this information will be saved to
the Debug Logs (mvn__Debug_Log__c) object. Visit
Debug logs.
Customers who would like to apply a different treatment to change event processing errors may implement an interface that can apply any treatment supported by the technologies made available by the Salesforce platform. Custom handlers should implement the Callable interface exposed on the Salesforce platform, providing support for the 'handleErrors' action.
The code block below illustrates the critical portion of implementing a custom error handler.
public with sharing class CustomAuditErrorHdlr implements Callable {
    /*
    * @description Callable implementation to be the default ErrorHdlr for RecordAuditEventHdlr
    * @param action Only accepts a value of 'handleErrors'
    * @param args   Only accepts a Map<String,Object> that should include a single key of 'errors' with a value containing a List<String>
    */
    public Object call(String action, Map<String, Object> args) {
        switch on action {
            when 'handleErrors' { ...
Salesforce Big Objects
Big objects are a special type of data store made available on the Salesforce platform that is designed to support large data volumes. Out of the box, up to 1 million Big Object records may be stored. Additional storage capacity can be purchased from Salesforce. Additional details on Big Objects can be found within the Salesforce documentation.
Data security considerations
Keep these considerations in mind when working with Mavens' Audit Trail:
-
By default, the native System Administrator profile will grant access to all audit records available in the system. As a result, customers are encouraged to review all individuals who have been granted such access are valid, and if necessary, implement the necessary changes to fine-tune who can see this information.
-
Mavens Audit Trail tracks and displays encrypted data when appropriate. However, Salesforce Big Objects are not encryptable by Salesforce, so data is stored unencrypted even if the field tracked was encrypted.
Escalation process
Users can escalate Interaction and Request records during a record
ownership transfer if the transfer reason equals one of the values
listed in the Escalation Reasons (MED_Escalation_Reasons__c) field on
the Local
Setting (MED_Local_Setting__mdt) custom metadata
type. Once a record is escalated, a flag will appear on the record as
well as the parent Interaction record, if applicable.
Enable escalation functionality
To enable the escalation functionality:
-
Navigate to the Local Setting (
MED_Local_Setting__mdt) custom metadata type. -
Navigate to the Default Local Setting metadata record.
-
In the Escalation Reasons (
MED_Escalation_Reasons__c) field, enter a list of possible reasons a user may want to escalate an interaction or request. Each unique escalation reason must be entered on a new line and must match a value in the Escalation/Transfer Reason (MED_Escalation_Transfer_Reason) global value set.
Escalate an Interaction record
To escalate an Interaction record:
-
In the Change Record Owner (
MED_ChangeRecordOwner) Visualforce component:-
Search for and select the user that should be assigned as the new owner of the interaction.
-
Select a transfer reason.
-
This transfer reason must be one of the options listed in the Escalation Reasons field on the Default metadata record of the Local Setting custom metadata type.
Once the interaction is escalated, the Escalated (MED_Escalated2__c)
field, the Escalation Flag (MED_Escalation_Flag__c) field, and the
Alerts (MED_Alerts__c) field on the record will automatically be set
to true. This means that both the escalation icon and the alerts icon
will appear.
When an interaction is transferred, all child records with the same owner will be transferred as well. For more information, reference the Change record owner page. caution
Medical Information Cloud does not actively use Salesforce's standard IsEscalated field on the Interaction (Case) object.
Escalate a Request record
To escalate a Request record:
- Ensure that the formula on the Escalated (
MED_Is_Escalated__c) field of the Request object equalsMED_Escalated2__c.
The formula is correctly set to MED_Escalated2__c in
out-of-the-box Medical Information Cloud versions V10 and above. You only need to update the
formula if you are upgrading from a version older than V10.
- Perform the same steps as escalating an Interaction record.
Once the request is escalated, the Escalated (MED_Escalated2__c)
field, the Escalated? (MED_Escalated__c) field, the Is Escalated
(MED_Is_Escalated__c) field, and the Alerts (MED_Alerts__c) field on
the record will automatically be set to true. This means that both the
escalation icon and the alerts icon will appear. This also means that
the Escalation Flag (MED_Escalation_Flag__c) field on the parent
Interaction record will be set to true such that the escalation icon
on the interaction will also appear.
A request is considered escalated if either the Escalated
(MED_Escalated2__c) field or the Is Escalated (MED_Is_Escalated__c)
field equals true. However, Mavens recommends using the latter instead of
directly setting the value on the former.
Remove an escalation
To remove an escalation from an Interaction or Request record, uncheck the Escalated field. The Escalation Flag field and the Escalated? field on the interaction and request, respectively, will subsequently reset, and all escalation and alert flags will disappear.
The Transfer Reason (MED_Transfer_Reason__c) field on both the
Interaction object and the Request object automatically clears after
each use. The history of the selected transfer reason for each
escalation is available in the Ownership Tracking related list.
QA review
To help ensure that Interaction requirements are being met, you can create Interaction QA records to perform QA reviews on closed Interactions. An Interaction QA record captures and stores QA review scores for how well the associated Interaction record was handled and documented.
You can create Interaction QA records via any of the following methods: setting up a monthly batch job to automatically generate Interaction QA records for random Interactions, using the ad hoc filtering feature to create Interaction QA records for random Interactions that meet specified criteria, and/or manually creating Interaction QA records for select Interactions. The Interaction QA tab displays a list view of all Interaction QA records, and a component on the Interaction record lists the Interaction QA records that are associated with that Interaction. Multiple Interaction QA records can be associated with a single Interaction record.
:::
 :::
:::
Special considerations
Keep these considerations in mind when setting up or performing a QA review with the Interaction QA object:
-
QA reviewers must:
-
Be assigned the
MED_Perform_QApermission set.MED_Perform_QAprovides permission and field-level security to the Interaction QA object, enabling users to perform QA reviews. -
Have Edit access to the Interaction records that they need to review.
-
-
The Use Interaction QA Object field on the Global Setting custom metadata enables/disables QA review with the Interaction QA object. To enable QA review with the Interaction QA object, set this field to
True. -
To make it possible for QA reviewers to see a list of Interaction QA records associated with an Interaction, add either the MIC - Related List Lightning Web Component or the Related List - Single component to the Interaction page layout and configure the component for the Interaction QA object.
Create Interaction QA records
There are three methods that you can use to create Interaction QA records:
-
Monthly QA batch job - a batch job that automatically generates Interaction QA records for random Interactions every month.
-
Ad hoc filtering - a user interface feature that enables you to generate Interaction QA records for random Interactions that meet specified criteria.
-
Manually - manually create Interaction QA records for select Interactions.
Set up monthly QA batch job
The monthly QA batch job randomly flags closed Interactions from the
previous month for QA review and creates Interaction QA records for the
flagged Interactions. The value assigned to the QA Reason field on
Interaction QA records created through the QA batch job is Automated.
To set up the QA batch job:
-
Configure the QA fields on the Local Setting custom metadata. Visit Step 1 - Configure Local Setting QA fields.
-
Schedule the
MED_QAFlagCasesBatchmonthly job. Visit Step 2 - Schedule the QA batch job.
Step 1 - Configure Local Setting QA fields
To enable the QA batch job and specify the number of Interactions or the percentage of Interactions to flag each month for review:
-
Navigate to the Local Setting custom metadata type records.
-
In the Quick Find box in Setup, search for and select Custom Metadata Types.
-
Click Manage Records in the Local Setting row.
-
-
Click Edit in the row of the segment that you want to enable the automated batch QA process.
-
Modify the QA field values. QA fields include:
-
QA Enabled - whether the automated batch QA Process is enabled.
-
QA Minimum Quantity to Flag - the minimum number of Interactions to flag each month per country.
-
QA Minimum Quantity to Flag only determines the number of Interactions to flag in a month if the minimum number is greater than the number of Interactions the QA Percent to Flag would yield for that month.
- QA Percent to Flag - the percentage of Interactions to flag each month per country.
QA Percent to Flag only determines the number of Interactions to flag if the number of Interactions it would yield for a month is greater than the value set for QA Minimum Quantity to Flag.
:::: ::: title Number of Interactions flagged :::
Sylvia Etup, a system administrator at Kalos Pharma, wants a batch job to flag Interactions for review each month. On the Local Setting custom metadata, she set the QA Minimum Quantity to Flag to 10 and the QA Percent to Flag to 20%. In January, the QA Minimum Quantity to Flag field determined the number of jobs to flag because its value exceeded the number of Interactions the QA Percent to Flag field would have yielded (5 Interactions). However, in February, the QA Percent to Flag field determined the number of Interactions to flag because the value it yielded was greater than 10.
| Month | Number of Interactions closed | QA Minimum Quantity to Flag | QA Percent to Flag | Number of Interactions flagged |
|---|---|---|---|---|
| January | 25 | 10 | 20% | 10 |
| February | 100 | 10 | 20% | 20 |
| :::: |
For more information on the Local Setting custom metadata, Visit Local Setting.
- Click Save.
Step 2 - Schedule the QA batch job
By default, the batch job is not turned on. To turn it on, execute a command in the developer console's execute anonymous window. Follow these steps to enable the batch job to run every month:
-
Ensure the user that is executing these steps has the Bypass Validation permission set otherwise the job will fail when it runs.
-
Open an Execute Anonymous Window. Visit Salesforce's documentation.
-
In the Execute Anonymous Window, enter
MED_QAFlagCasesBatch.scheduleMonthlyJob();and then click Execute.:::
 :::
:::In the Logs tab at the bottom of the developer console, you should see a log with status Success.

Run ad hoc QA filtering jobs
Use the ad hoc QA filtering feature to randomly select closed
Interactions that meet specified criteria for QA review and to create
Interaction QA records for the selected Interactions. The value assigned
to the QA Reason field on Interaction QA records created through this
method is Ad Hoc.
Special considerations
Keep these considerations in mind when using the ad hoc QA filtering feature:
-
To use this feature, users must:
-
Be assigned the
MED_Run_Ad_Hoc_QApermission set.MED_Run_Ad_Hoc_QAenables users to run the Ad Hoc QA tool to mass flag Interactions for QA. This permission set does not grant permission to perform QA, only to flag for QA. -
Have access to the Ad Hoc QA tab
-
-
Available filter fields can be selected/changed using the Ad Hoc QA Filter custom metadata. Filter fields can also be segment specific.
-
The pool of Interactions that ad hoc QA jobs select from includes:
-
Closed Interactions that have never been selected for QA
-
Closed Interactions that are marked for QA
-
Closed Interactions that have already been reviewed
As a result, some Interactions may be marked for QA again.
-
Flag records based on criteria
To flag random Interactions for review based on a set of parameters:
-
From the App Launcher, search for and select Ad Hoc QA. The MED_AdHocQA tab opens.
-
Enter filter parameters. Required fields include:
-
Country - the country that an Interaction must be to be selected for QA review.
-
QA Percent to Flag - the percentage of Interactions that meet the filter parameters that should be flagged for QA review.
-
QA Percent to Flag only determines the number of Interactions to flag if the number of Interactions it would yield is greater than the value set for QA Minimum Quantity to Flag.
- QA Minimum Quantity to Flag - the minimum number of Interactions that meet the filter parameters that should be flagged for QA review.
QA Minimum Quantity to Flag only determines the number of Interactions to flag if the minimum number is greater than the number of Interactions the QA Percent to Flag would yield.
-
Start Date - the start of the date range that an Interaction must fall in to be flagged for QA review.
-
End Date - the end of the date range that an Interaction must fall in to be flagged for QA review.
- Click Flag Interactions.
Manually create records
From a closed Interaction that needs QA review, you can manually create a new Interaction QA record using one of these methods:
-
Create the Interaction QA record from either the MIC - Related List Lightning Web Component or the Related List - Single component on the Interaction record.
-
Navigate to the component on the Interaction.
-
Click New. A new Interaction QA record opens.
-
-
Create the Interaction QA record using the QA Review quick action.
-
Click the QA Review quick action on the Interaction record. The QA Review modal opens.
-
Select Review Required for QA Status and Targeted for QA Reason.
-
Click Save. A new Interaction QA record is created.
-
Complete QA review
To complete a QA review for an Interaction that has an associated Interaction QA record:
-
Navigate to the Interaction QA record using one of these paths:
-
From the Navigation menu, select Interaction QAs, and then click the Interaction QA Name of the record that you want to complete.
-
From an Interaction record, navigate to either the MIC - Related List Lightning Web Component or the Related List - Single component for the Interaction QA object, and then click the Interaction QA Name of the record that you want to complete.
-
-
Select values for the fields listed below. These values should reflect your assessment of the Interaction. For field descriptions, visit Interaction QA.
-
Accuracy of Logging
-
Appropriate Documentation of AEs
-
Appropriate Documentation of PQCs
-
Appropriate Selection of Content
-
Overall Quality of Response(s)
-
Quality of Response Delivery
-
-
In the Status field, select Review Completed to close the QA Interaction record and mark the review as done.
Once you complete your review, you can Chatter the Interaction owner to let the owner know that you have finished your review. You can also create a custom report to view the results of QA reviews over time to help identify trends. For information on how to build a report, visit Salesforce's Reports documentation.
Record locking
The Inquiry Management objects allow for the locking of records. This is accomplished via
locking triggers (MED_LockRelatedRecordsHdlr and MED_LockRecordHdlr)
that are enabled on an object (Account, Contact Information, and
Affiliation) using the trigger action framework (TAF). Locking triggers
are configured on the MED_Locked__c boolean formula field on each
of the objects. In cases where a record's MED_Locked__c formula
evaluates to true, the system prevents the following actions:
-
Editing of the record itself
-
Deleting/Editing of related Files and Attachments
-
Deleting/Editing of Chatter Posts
-
Adding new versions of related Files
-
Removing File associations
-
Deleting of related Notes
If using trigger action framework, individual objects can be configured
such that locking can be enabled or disabled using the Trigger Action
(mvn__TAF_Trigger_Action__mdt) custom metadata type and the
appropriate MED_LockRelatedRecordsHdlr (if locking is controlled by a
parent object) or MED_LockRecordHdlr if locking is controlled by itself.
Locking rules (what fields on what objects define "locked" in addition
to the error messages) can also be customized by creating a Callable
class and specifying it in the Global Setting
(mvn__MED_Global_Settings__mdt) Locking Rules Class
(mvn__MED_Locking_Rules_Class__c) field setting. To make your own.
class, clone the MED_LockingRulesHdlr class and modify it as needed.
Enabling record locking
By default, the records are configured to be locked when their
MED_Source__c is not Medical Information Cloud (for Accounts) or
MED_Is_Closed__c/IsClosed is checked (for other objects). This logic
can be altered to meet specific requirements.
Users with the Bypass Validation custom permission will not be subject to the record locking.
Code can also bypass the locking by setting MED_Override_Lock__c to
true as part of the transaction.
Disabling record locking
Locking can be disabled on any of the above mentioned objects by simply
changing the formula to return false. For Medical Information Cloud V15, you can also disable
them by checking the checkbox in the Bypass Execution
(mvn__TAF_Bypass_Execution__c) field on the Trigger Action
(mvn__TAF_Trigger_Action__mdt) metadata record.
Custom labels
This component makes use of the following labels that can be configured within the Salesforce translation workbench to change display text values.
| Label name | Description |
|---|---|
| MED_Attachment_Parent_Closed | Generic error message displayed when editing/deleting Files or Attachments on a locked record. |
| MED_Cannot_Modify_Record_on_Closed_Case | Error message displayed when editing/deleting Files or Attachments on a locked Case. |
| MED_Cannot_Modify_Record_on_Closed_Fulfillment | Error message displayed when editing/deleting Files or Attachments on a locked Fulfillment. |
| MED_Record_is_Locked | Generic error message displayed on record if it meets the locked criteria. |
Service level agreements
Service level agreements (SLAs) allow the documentation and tracking of responses within a calculated time frame based on the due date. The SLA feature automatically calculates the due date and stamps it on Requests, Adverse Events, and Product Quality Complaints. The due date also drives the Alert field which is denoted on the record as a colored flag, the color of which is determined by the time left before the due date or if a due date was missed (e.g., red flag). View Calculations for more information.
Service level agreements are defined on the Local Setting custom metadata type through the following fields:
The fields specified in the table are only the fields that apply to Service Level Agreements. The table is not inclusive of all Local Setting custom metadata types.
Fields
| Field Label | API Name | Type | Description |
|---|---|---|---|
| Business Hours Name | MED_Business_Hours_Name__c | Text(80) | API name of the associated Salesforce Business Hours record to apply. |
| SLA Warning | MED_SLA_Warning__c | Number(2, 2) | SLA Warning in Business Hours before the due date. This sets the flag to orange and stamps the Due Date warning field. |
| Request SLA | MED_Request_SLA__c | Number(2, 2) | SLA applied to Request cases in Business Hours before the due date. This sets the flag to red after the due date and stamps a date into the Due Date field. By default, a Request SLA is 40 Business Hours. |
| Escalated Request SLA | MED_Escalated_Request_SLA__c | Number(2, 2) | SLA applied to escalated Request cases in Business Hours before the due date. This sets the flag to red after the due date and stamps a date into the Due Date field. By default, an escalated Request is 16 Business Hours. |
| Adverse Event SLA | MED_Adverse_Event_SLA__c | Number(2, 2) | SLA applied to Adverse Events in Business Hours before the due date. This sets the flag to red after the due date and stamps a date into the Due Date field. |
| Product Quality Complaint SLA | MED_Product_Quality_Complaint_SLA__c | Number(2, 2) | SLA applied to Product Quality Complaints in Business Hours before the due date. This sets the flag to red after the due date and stamps a date into the Due Date field. |
All calculations count only working hours as defined by the specified Business Hours record. Holidays specified on the Business Hours record are accounted for as well. For example, an SLA of 8 hours could stamp a due date 4 days later if there are short working hours and specified holidays.
Calculations
Due dates are calculated using the following approach:
-
"Escalated" is defined as the formula field
MED_Is_Escalated__c=true. Visit Escalation process for additional information. -
Due date calculations are in hours and only count business hours as defined by the Business Hours field on the Interaction (Case) which is automatically set to the Business Hours Name (
MED_Business_Hours_Name__c) record specified in the local settings). -
The due date is working hours from the opened date (which technically can be different from the created date to allow for loading and back-dating a request from offline).
-
The calculation is re-done if any of three events happen: record is created, escalation changes, opened date changes.